How to grind walls for wiring with your own hands

One of the stages of a major overhaul in a modern apartment or house is the partial or complete replacement of electrical wiring. Installation of sockets and switches in places where they were not previously, as well as the installation of additional light sources, requires laying new wires. To prevent cables from spoiling the interior and endangering fire safety, it is recommended to hide them in the wall. For new branches of the home electrical main, you need to groove, and if you do not want to spend money on the services of professional electricians, you will have to do it yourself. In this article, we will figure out how to grind walls for wiring, highlight the nuances of this procedure, and also answer the question of which tools are best for doing this.
Content
Slitting walls for laying wires: the main nuances
Before chasing the walls of your house for wiring, you need to pick up a pencil, a sheet of paper and draw up a detailed wiring plan, which will provide for the placement of all electrical elements - from lamps to switches and sockets. You also need to take into account the material from which the building is built (aerated concrete, brick, wood), and choose the tool that is best suited for arranging a groove for electrical wiring.
The distribution of electrical wires in the walls of buildings is governed by building codes and rules, which must be studied at least for informational purposes, since their failure to comply can lead to a violation of electrical safety when performing work. The general provisions of these documents are as follows:
- The wall for laying the wires should be slit in such a way that the groove is directed strictly vertically or horizontally.
- The vertical strobe should be at a distance of at least 0.1 m from the wall openings.
The distance from the electric groove to the gas line must be 0.4 m or more.
- The horizontal groove should be at least 0.15 m from the ceilings.
- The depth and width of the groove should not be more than 0.025 m, and its maximum continuous length should not exceed 3 m.
- The wiring should not have many bends in the path of the cable to the electrical components from the junction boxes. It is not recommended to use more than one corner transition.
- It is prohibited to lay horizontal grooves in load-bearing walls.
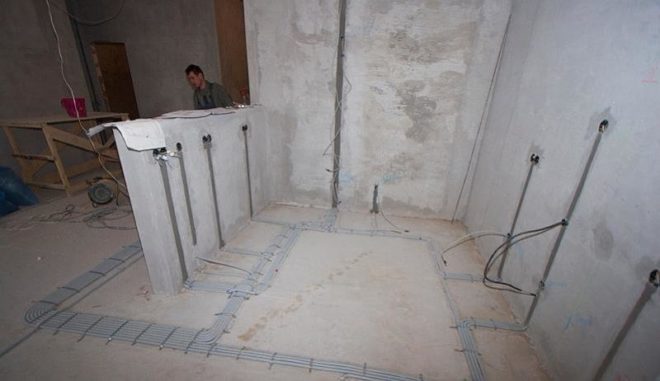
The layout of the wiring must be drawn up, guided by the above rules - this will allow it to be carried out in accordance with current regulations and without violating safety requirements. When the electrical wiring is planned, you can proceed to the next stage of work, in which the walls are channeled for wiring with your own hands.
Slitting walls made of aerated concrete and brick
Aerated concrete is very durable, so using a chisel and a hammer to work with them is hardly a reasonable solution. To the question - how to gouge a concrete wall - we can answer: it is best with a chasing cutter. It will allow you to cut a groove in the wall for wiring without dust, with minimal time and labor. But if you, like most ordinary owners, do not have this opportunity, use a hammer drill or grinder.
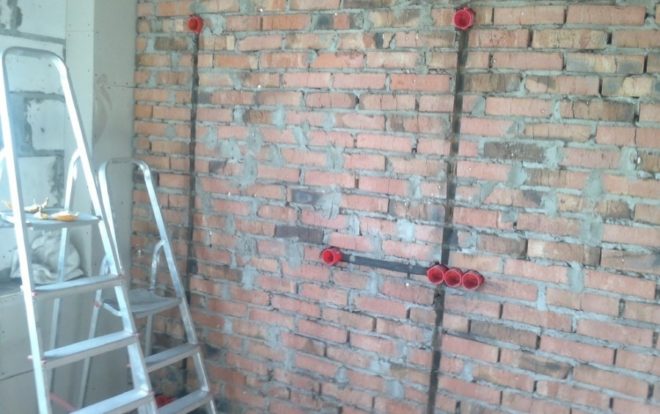
Brick is the most convenient material for this job.The mixture of cement and sand, which is used to bond the elements of a brick wall, can be easily knocked out even with a chisel and a hammer, so arranging a horizontal groove does not take much time. But punching a vertical groove will be more difficult, since in this case you will have to work directly with bricks.
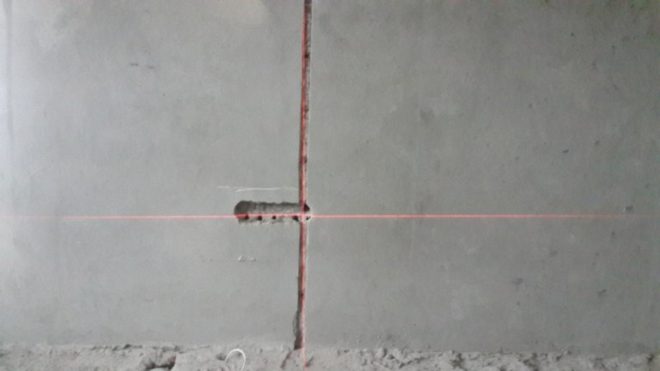
Wall marking and preparation for work
Before starting the chasing, it is necessary to find out if there are any hidden electrical cables on the planned route. This can be done using a special device - a locator, which will quickly determine the location of the wire. This avoids the risk of the tool getting caught in a live cable during operation.
After that, the wall must be marked along the route of laying the future groove.
The marking should start from the junction box, and then lead it to the places of the future installation of electrical devices (sockets, lamps, switches).
Before gouging the wall, take a damp cloth and cover the doorways with it to prevent dust from scattering throughout the room.
What is the best tool to gouge walls?
You can make a strobe using the following tools:
- Chisel and hammer. This is the oldest and cheapest method, however, it is associated with a lot of time and effort.
- Hammer drill, hammer drill. The laying of a groove with this tool in a domestic environment is most often done.

- Electric grinder. This unit allows you to make the most even groove, but at the same time its use has a significant side effect associated with the strong dusting of the working room.
- Wall chaser. It is the easiest and most convenient way to gouge the wall for wiring with this tool, but people whose work is not associated with the frequent execution of the gating procedure purchase it extremely rarely due to the high price of the device and the narrow scope of use.
The order of this operation is the same, no matter which tool you choose to work with.
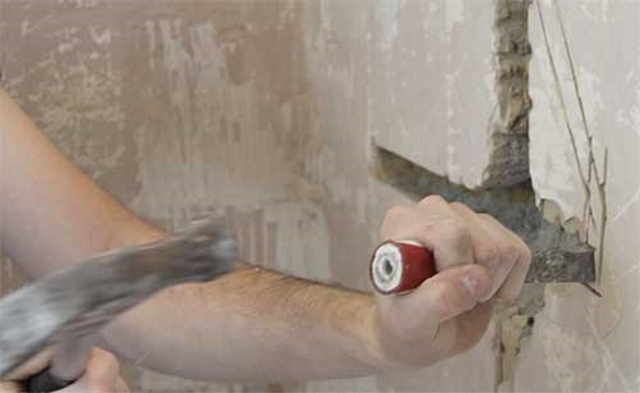
Chipping walls with a hammer and chisel
As mentioned above, you should not try to cut a groove for electrical wiring in a concrete wall with these tools - such work will be very long and tedious. But it is quite possible to cope with them with a brick wall. This procedure is performed in the following order:
- Use a chisel to deepen the top and bottom edges of the markings.
- Putting a chisel across the future groove and hitting it with a hammer, knock out the top layer of the groove core.
- Removing the layers one by one, deepen the furrow by 2-2.5 cm, passing with a chisel and hammer along its entire length.
When the groove is ready, dust must be removed from it and treated with a primer. When it dries, lay the cable inside, then putty the furrow (you can also seal it with plaster or plaster).
How to make a strobe using a puncher?
With a puncher, you can both chisel a concrete wall and make an electric groove in a brick one. There are special nozzles designed for this job, one of which is called a wide auger and the other a spade. The procedure for this procedure is as follows:
- Using a punch with a wide drill, drill holes 2-2.5 cm deep along the markings made.The distance between adjacent holes should be 1-1.5 cm.
- Change the nozzle on the rotary hammer by installing a spatula instead of the drill.
- Make a furrow through all the grooves. The wire will fit into it.
More details about chipping with a puncher in the video:
The advantage of this method is the speed of work. The disadvantage is that the hammer drill does not allow you to make an even groove, and the groove made will have ragged edges.
Wall chipping with a grinder
With this tool, you can easily make an electrical groove in any wall - concrete, brick, plaster.For these works, a diamond-coated disc is put on the grinder. Slitting is done in the following order:
- With the help of a grinder, make two parallel cuts in the wall along the entire length of the marked marking. The depth of the cut lines and the distance between them should be approximately the same - 2-2.5 cm.
- Remove the central part from the resulting groove with a puncher. If you don't have a hammer drill, you can use a hammer and chisel.
The advantage of this method is that the resulting strobe has almost perfectly straight edges. The disadvantage is a huge amount of dust generated during work.
So that it does not cover the whole room, it is advisable to use the help of another person who, while the grinder is working, will hold the suction hose of the working vacuum cleaner near the cut.
In the video, an example of chasing with watering:
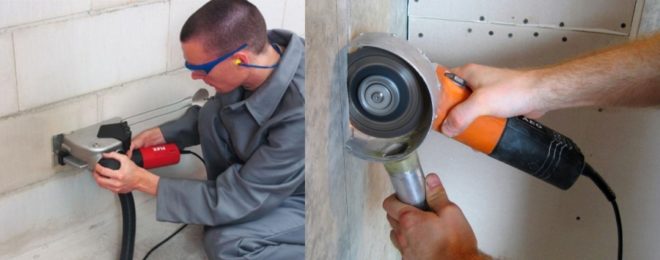
Electric groove cutting with a wall chaser
This tool looks like an improved grinder. It is equipped with two diamond discs that can be fixed at the desired distance from each other. They are closed with a casing that prevents dust from scattering around the room and prevents the chasing cutter from beating against the wall.
The adjustment of the position of the discs, which is provided by the design of the device, allows you to change the width and depth of the groove being made. In addition, the tool casing is equipped with a branch to which a vacuum cleaner is connected during operation. In this way, dust generated during operation will directly enter the waste bag, which will keep the room clean.
The groove cutter allows you to cut a groove in the wall in the shortest possible time, and besides, without dust, after which it remains only to remove the core from it. As with the grinder, this can be done with a hammer drill, or with a hammer and chisel.
About work with a chasing cutter in the video:
Conclusion
In this material, we figured out how to properly cut a wall in a room for electrical wiring. Having picked up a tool taking into account the material from which the walls are made, you can quickly cope with this work without dusting the room. As you can see, having a modern tool and following the recommendations given, you can carry out electrical wiring in your home yourself, without resorting to the services of an electrician.


