Retro style wiring in a wooden house

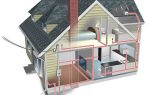
For the construction of country houses, as well as summer cottages, wood is used in most cases. The main advantages of this building material are naturalness, environmental friendliness and low cost in comparison with others. But, along with these advantages, the tree has a serious disadvantage - poor resistance to fire. The most common cause of fires is errors in the selection or installation of electrical wiring. Retro-style wiring in a wooden house will help to minimize the risk of fire and give the home an original touch of antiquity.
Content
Retro wiring device and its advantages
The retro-style effect is achieved as follows: two to three electrical conductors with a cross section of 0.75-2 sq. mm are twisted with each other and covered with a layer of decorative insulation made of silk, which is impregnated with a special compound that does not lend itself to fire. The number of braided wires depends on whether the house is grounded or not. The wires used in retro wiring are usually copper and PVC coated for added protection.
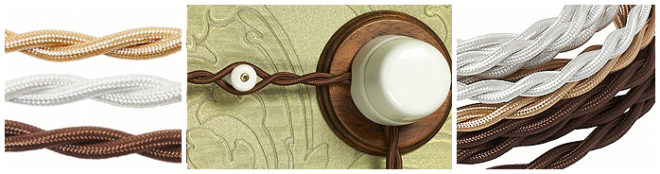
Cables are often commercially available that have a fabric, fiberglass or paper outer sheath. There is no need to be afraid of this - reliable insulation is laid under the layer of this material.
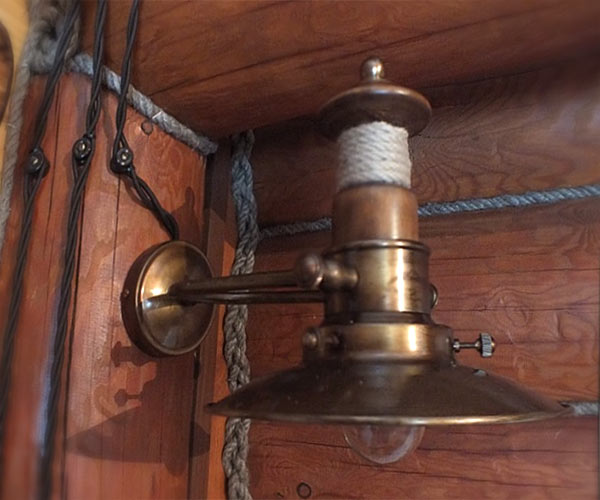
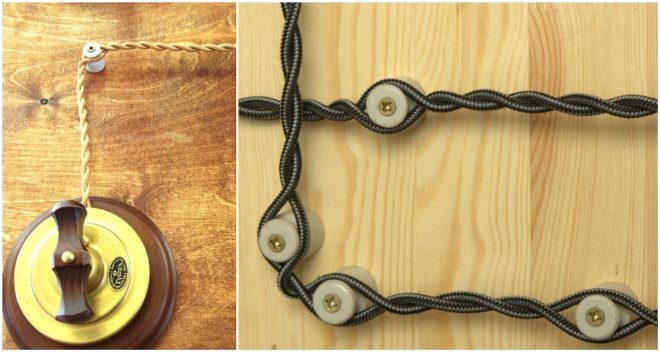
Structurally, retro-style wiring is an open communication, in which the switching elements, as well as conductors, pass on top of the fence structures.
All functional components are fastened to the base surface using suitable insulators.
Details about retro wiring in the video:
It is always easier to conduct open wiring than hidden wiring, since in the first case the chain is assembled in an overhead method and there is no need for grooving in the walls. When installing hidden wiring, this stage takes a lot of time and effort.
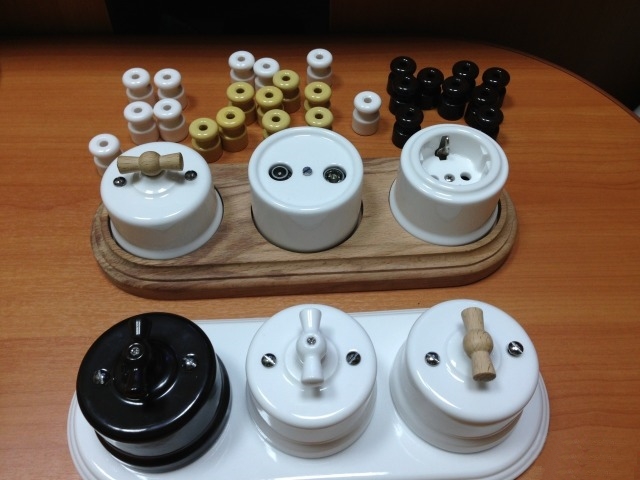
Retro wiring can be done in a wide variety of variations, and the commercially available components are available in a wide variety of colors. This will allow, when purchasing products for installation, to choose those that best fit into a particular interior.
In case of disruptions in the operation of an open network, even if the junction box is faulty, repairs will not be difficult due to easy access to any area. An additional factor of protection against ignition is the installation of switching elements and cables on insulators (insulating gaskets).
Antique electrical parts are made of modern fireproof materials. In addition, when repairing a room in which the electrical wiring is installed in an open type, you are unlikely to accidentally damage the cables.
Disadvantages of retro wiring
Along with the above advantages, old-style wiring has a number of disadvantages. These include the following points:
- Conductors are less secure than in the case of hidden communications.
- The arrangement of structural elements on top of the support requires free space, which can cause serious inconvenience in small rooms.
- If it is planned to carry out interior decoration in the house, then the external wiring will greatly complicate the implementation of repair work.
- The small cross-section of cables (no more than 2.5 sq. Mm) does not allow connecting powerful electrical devices - such wires cannot withstand a high load.
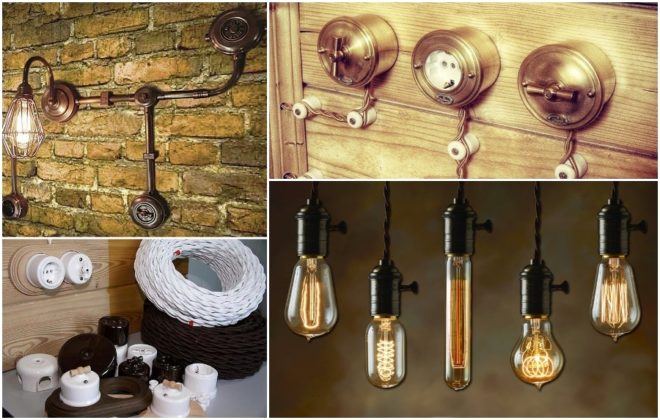
- Electrical products for old-style wiring are quite expensive. The cost of branded products such as Fontini and Bironi is especially high.
But in general, if you have sufficient funds and do not plan to install high-power household appliances in your home interior, retro-style wiring will be not only original, but also the most reasonable solution.
Selecting Old Style Electrical Wiring Materials and Getting Started
If you are going to conduct vintage wiring yourself, you need to stock up on:
- Wires with the required cross-section.
- Junction boxes in the right quantity.
- Porcelain insulators.
- Sockets and switches (they must be overhead).
- Self-tapping screws for woodworking.
Old-style electrical wiring can be colored differently, but the color can seriously affect the cost - for example, a brown switch will cost significantly less than a gold one.
Varieties of retro wiring details on the video:
The highest quality, but at the same time expensive equipment is produced in Italy. The most popular are the products of the Fontini company.
Vintage wires must be carefully selected according to the color of the braid so that they are in harmony with the overall design of the room. In accordance with the color of the cables, the color of the rest of the wiring elements is selected.
You can choose bright, contrasting colors at will, or choose calm colors.
Since cables for retro wiring are expensive, some savings can be made by running them only in open areas. Where electrical wiring will be hidden behind objects or sheathing, regular conductors can be used by tucking them inside a color-matched cable duct.
In addition, twisted wiring can be made independently by twisting three wires into a bundle (if there is grounding in the house) or two (if there is none). Although, of course, in appearance and quality, such a homemade cable will be significantly inferior to factory-made wire.
Retro style electrical wiring installation
After purchasing the necessary materials and finishing the finishing work, you can proceed directly to the electrical installation process. The first thing to do is to draw up a diagram, marking in it the places where the lamps, as well as sockets and switches will be located.
Then work is done in the following order:
- Guided by the drawn up scheme, make sketches directly at the work site. The lines drawn should be strictly horizontal - this can be checked using the level.
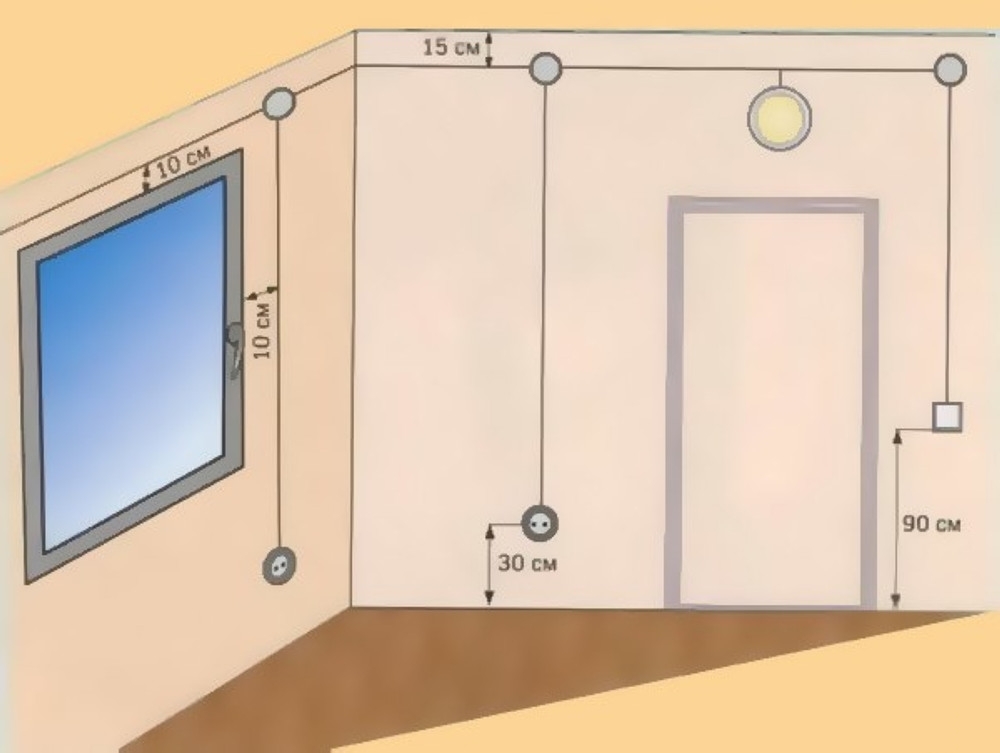
- Install insulating porcelain rollers along the entire length of the markings at a distance of 50 cm from each other, fixing them with a screwdriver and self-tapping screws. The distance from the switch (socket) to the first insulating roller must be at least 5 cm.
- In accordance with the diagram, install the junction boxes, as well as other electrical elements in their places.
- Fasten cables to rollers.
It is necessary to take into account when tensioning the wires that the distance from them to the surface should be at least 1 cm.
Video editing process:
The installation of semi-antique electrical wiring is possible not only in wooden houses. If a modern apartment is designed in the appropriate style, then vintage wiring can be an excellent addition to the interior. This touch will be appreciated by guests who understand a lot about vintage and retro. But, as mentioned, when going to make electrical communications of this type, get ready for financial costs, because the elements for them, even those made in China, are not cheap.
Conclusion
From this material, you learned what retro wiring is in the interior of a wooden house and what are the features of its installation.Guided by the article you have read and the tips set forth in it, you can install it yourself without resorting to the services of a professional electrician.